Custom Control - BenefitCode Walkthrough Example
Custom Control - BenefitCode Walkthrough Example
This example demonstrates a custom control plugin for Web Determinations. For more general information on constructing and debugging custom control plugins, see Create a Custom Control
In our example, we have a kind of attribute in the rulebase (a benefit code) where the attribute is stored as a single text string, but the string has multiple parts that we want the end-user to edit with separate HTML widgets.
The example custom control provider replaces any text input control where the screen author in Oracle Policy Modeling has set the control's HTML class to 'BenefitCode'.
The example includes two re-usable abstract classes, InterviewControlWrapper and InputInterviewControlWrapper, which delegate as much as possible to the source control in the rule engine runtime layer, allowing your custom formatter to concentrate on special cases.
To construct this example:
Build a custom control plugin
Build a plugin which has the following four classes:
BenefitCodeControlProvider -- this is the class that Web Determinations will look for and load on startup. It can determine which rulebases or data sessions it wants to attach to; our example plugin will attach to anything. Our class will look for text controls attributes with the HTML class 'BenefitCode' and replace them by a custom control.
BenefitCodeControl -- this is the custom control itself. It is tightly coupled with the same-named BenefitCodeControl.vm velocity template. The control and the template work together to render the control and interpret the user input.
InterviewControlWrapper -- this is an abstract convenience class which defers to the rule engine layer's version of the control wherever it can, for all controls.
InputInterviewControlWrapper -- this is an abstract convenience class for input controls, which adds methods to defer to the rule engine layer for input (attribute) controls.
Copy the uncompiled rulebase .zip file found at examples\rulebases\source\BenefitCodeExample.zip (in either the Java or .NET runtime zip file) to a place on your machine where it can be unzipped ready for use.
Copy the CustomControlBenefitCode.jar file or the CustomControlBenefitCode.dll file from examples\web-determinations\custom-control (in either the Java or .NET runtime zip file) to your rulebase's plugins directory, where Oracle Web Determinations can find it. If your rulebase is at <...>\BenefitCodeExample, the correct directory for your plugin is <...>\BenefitCodeExample\Release\web-determinations\WEB-INF\classes\plugins. If the Release directory does not exist, Build and Debug with screens to create it.
Copy the velocity template file BenefitCodeControl.vm from examples\web-determinations\custom-control\src to your rulebase's templates directory. If your rulebase is at <...>\BenefitCodeExample, the correct directory for your control template is <...>\BenefitCodeExample\Release\web-determinations\WEB-INF\classes\templates\controls\BenefitCodeControl.vm. The file name is important here - it must match the name of the custom control class exactly or the file will not be found.
Build and Debug with Screens; your plugin should now be loading.
Customize the rulebase to use the plugin
BenefitCodeExample is already setup to use the plugin, but here are details on how to configure any rulebase to use it.
Now we want to invoke our plugin to use our custom control. The plugin is looking for an HTML class, "BenefitCode" so we need to create a screen and put that class on the control.
In Oracle Policy Modeling, right-click the Screens folder, and choose "Add New Screens File". Call it "screens".
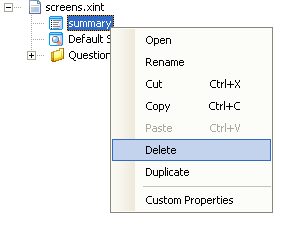
By default, screens files are created with an empty summary screen. A real application would carefully customize this screen, but in our simple example we will delete it to use the automatic summary screen instead.
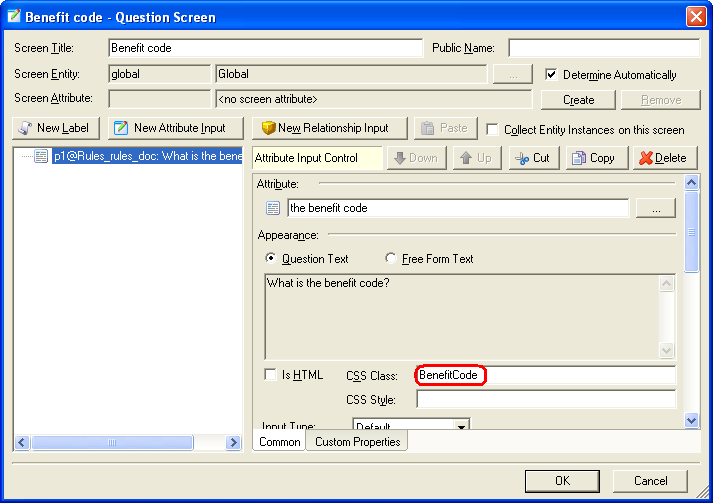
Right-click the Question Screens folder and select, "New Question Screen"
On the new screen, add a control for our benefit code attribute, and set the HTML class of the attribute to "BenefitCode"
Click OK, save, and build and debug again. Your custom control should now be working!
Note that when you view a decision report or data review screen, the raw text value will be printed; for example, "RET-1234" in this case. If you want your attribute values to be formatted specially even when printed outside of your custom control, you will need to implement a custom formatter as well. See Formatter Plugin
Source Code
To view the source code for the Custom Control sample, refer to examples\web-determinations\custom-control in either the Java or .NET runtime zip file.